Before we get started talking about tracking any Amazon coupon code, I’d like to ask you a question…
Do you know how many people who claimed a coupon code during your Amazon product launch or promotion actually used the coupon to make a purchase?
If not, then today I’m going to show you how to find that missing piece to complete the puzzle.
Below is a video walkthrough I made to guide you in tracking any Amazon coupon code you have given out; but before I show you that, I want to make sure you are clear on how important it is to know your numbers. Not tracking your data in business is like trying to drive a car to a destination with a blindfold on.
If you end up at your destination, you were pretty damn lucky.
I don’t know about you, but I don’t like to leave my business success up to being lucky.
We are not just “Amazon Sellers” (this is where I slam my fist down on the table with focused energy and pride), we are business owners. We are marketers. We are entrepreneurs.
I don’t know of one successful business owner who enjoys success without knowing the numbers in his or her business.
It’s that important, especially if you’re running Facebook ads to your Amazon product listing.
Okay, ‘Nuff said. Let’s get on with the tutorial, shall we?
Step 1: Set Up Your Amazon Promotion Tracking ID
This part of the walkthrough is the only one in which you do before your Amazon product promotion.
If you’re going to track the usage of an Amazon coupon code, you’ll need to make good use of Amazon’s Tracking ID tag. When setting up your promotion, be sure to give the Tracking ID a name which you can easily identify in a spreadsheet.

I like to name mine by putting the date in there. Sometimes I might even put the day.
So for example, if you’re running a promotion where each day you’re distributing an Amazon coupon code good for that day only and you’re running a CPR promotion (typically is around eight days), you might name your tracking codes like this:
- xyz-coupons-70percent-off-060118-monday
- xyz-coupons-70percent-off-060218-tuesday
- xyz-coupons-70percent-off-060318-wednesday
- xyz-coupons-70percent-off-060418-thursday
- xyz-coupons-70percent-off-060518-friday
- xyz-coupons-70percent-off-060618-saturday
- xyz-coupons-70percent-off-060718-sunday
- xyz-coupons-70percent-off-060818-monday
In the above examples, “xyz” is just something to uniquely identify our units sold inside a spreadsheet which were purchased using a coupon (see Step 3 below on how we Filter spreadsheet results). This signifier could be something random or maybe a prefix of your company.
The rest is probably self-explanatory. I put the percentage off, the date, and the day in my tracking codes.
Of course, you don’t have to do it like this–it’s just a suggestion. Take the ideas I have and adapt them to what works for you.
Step 2: Download Your Product Sales Report & Put Them In A Spreadsheet
Once your promotion is over, head over to Seller Central and click Reports from the main menu, and then choose Fulfillment.
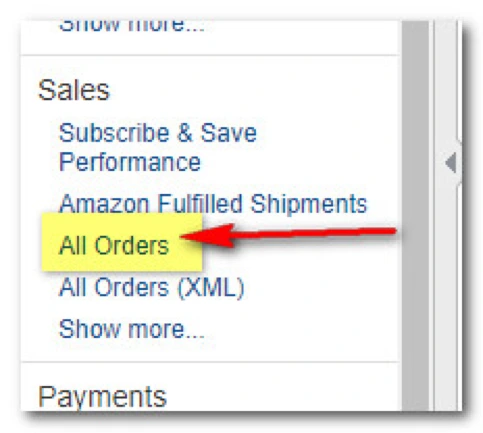
From there choose All Orders under the Sales menu.
Next, click the Download tab and choose the dates you ran your Amazon coupon code promotion through. Be sure to add an extra day or two as your end date to compensate for any time zone differences from when your promotion was set to end.
For example, your promotion might end Saturday night at 11:59 PM PST, but what time is it on the East Coast? Amazon will likely show coupons claimed on Sunday if it’s in that window, so make sure to catch those in your report.

Once you download the report, you’re going to get a text file which looks something like what you see below. To make it readable, you’ll need to copy all the text in that file and paste it into a spreadsheet.
For this example, I’ll be using Microsoft Excel.
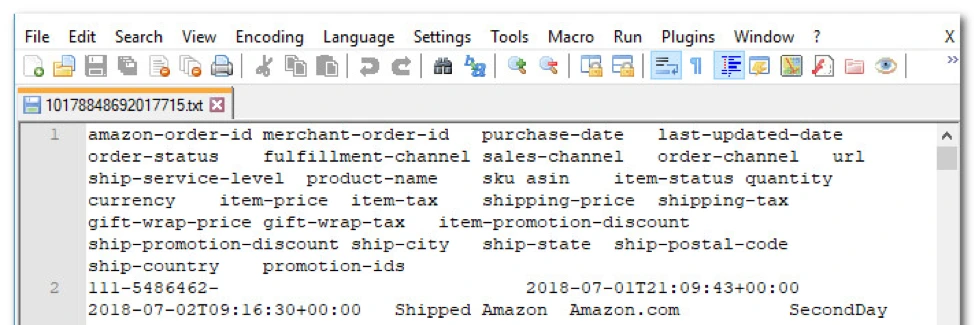
Copy the text in that text file and paste it into a spreadsheet.
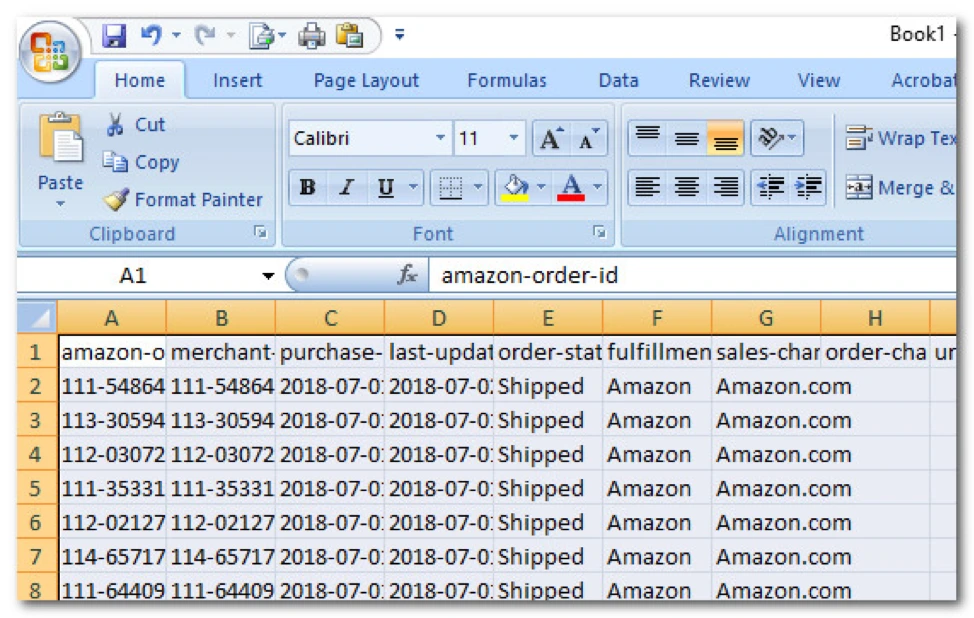
Step 3: Edit Your Spreadsheet, So It Gives You A Clear Picture
Okay, awesome! You’ve got all your Amazon coupon code data in a spreadsheet; now we need to go through some steps to clean it up a little, so we have a clear picture of our week’s promotion.
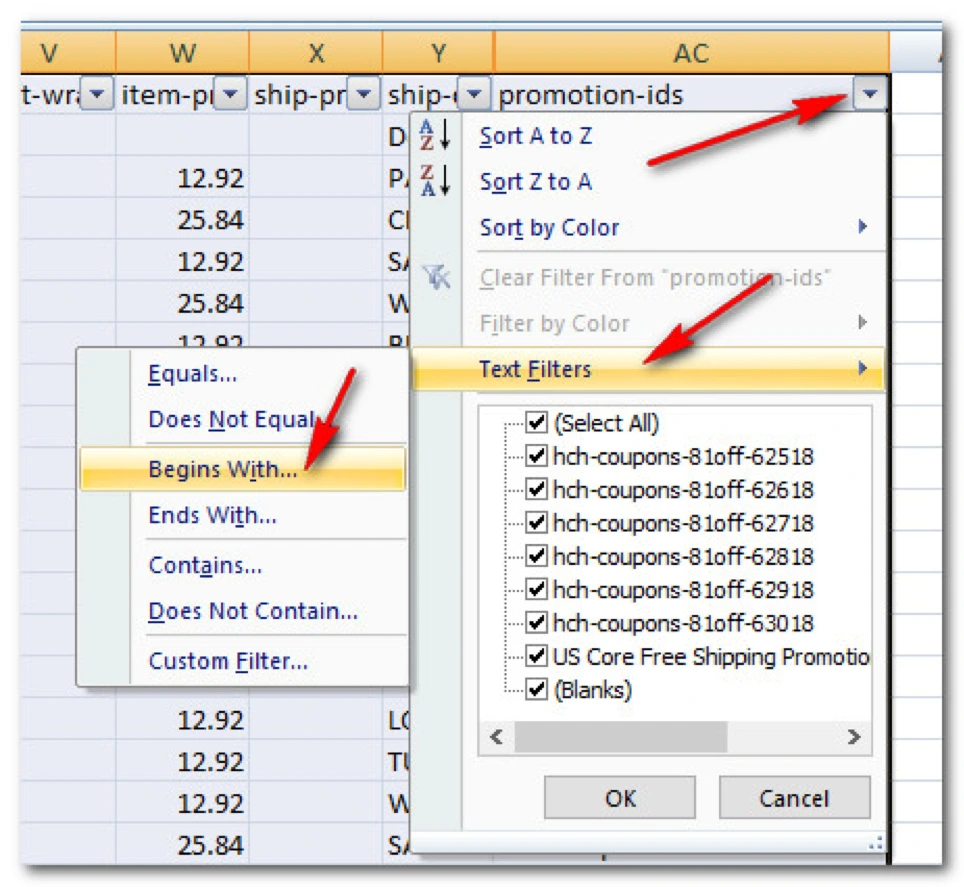
The first thing I want you to do is to filter your results so that only sales attached to your Tracking ID (in the spreadsheet, it’ll be under the promotion-ids heading) shown in your spreadsheet.
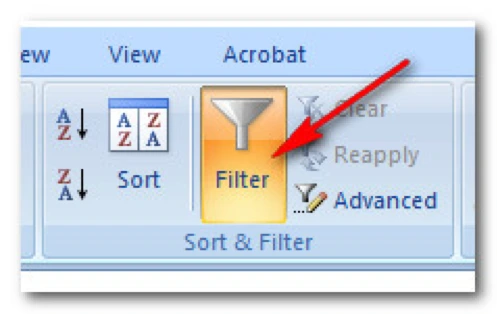
Click the Filter button from the Data tab if using Excel.
Then click the drop-down menu button you see in the top right corner of the promotion-ids cell and choose:
- Text Filters
- Begins With…
Once you hit the OK button, a box will pop up as you see below. Here we will tell Excel only to show rows which contains some text in the promotion-ids column which begin with “hch” in this case.
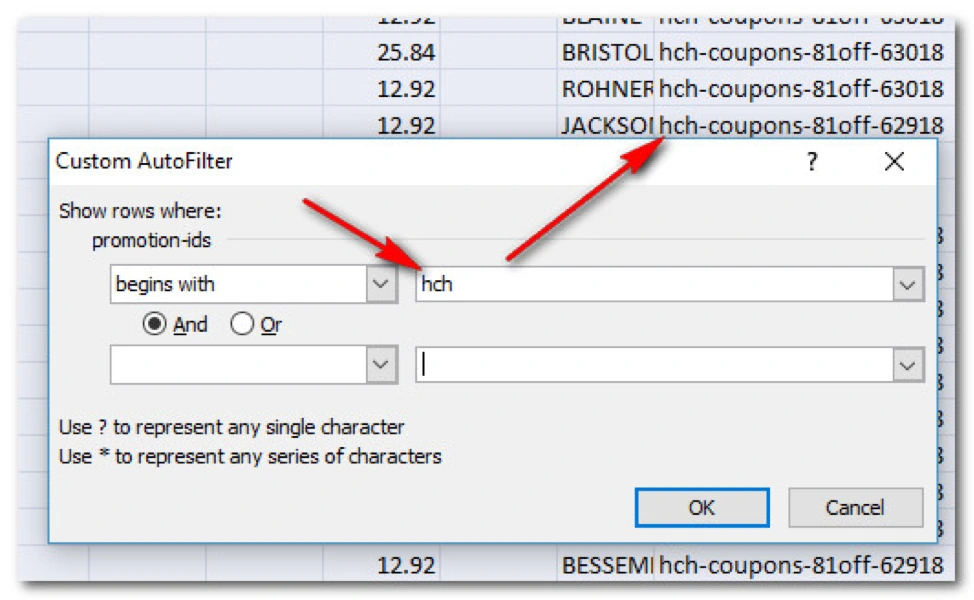
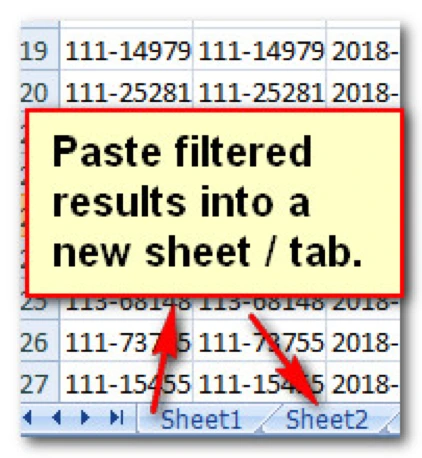
Our next step is to copy the filtered results into a new sheet so we can work with the rows and columns a little easier.
So copy all the text which contains your filtered results (including the column headings) and paste them into a new sheet/tab.
At this point, you can organize the columns and headings to your liking. You can even rename the column headings if you choose.
In our example, I have the Order ID on the far left, the purchase date next to that, then the Tracking ID, and so on. But there’s one small thing which we still need to clean up a little to make our Amazon coupon code tracking report nice, neat, and easy to read.
Notice how the purchase-date doesn’t look so good. It’s got a date in there along with a time stamp.

Let’s clean that up a little so we can see the actual days of the week in our report.
I like to create two new columns and name them Date and Day as shown below.

Next, we’ll use a couple of formulas to fill in these two columns.
The first one we will do is the Date column. As you can see in column B, we have the year, month, and day on which the Amazon coupon code was used. To show only that data in the C column (and not the time stamp), use this formula:
=left(B2,10)
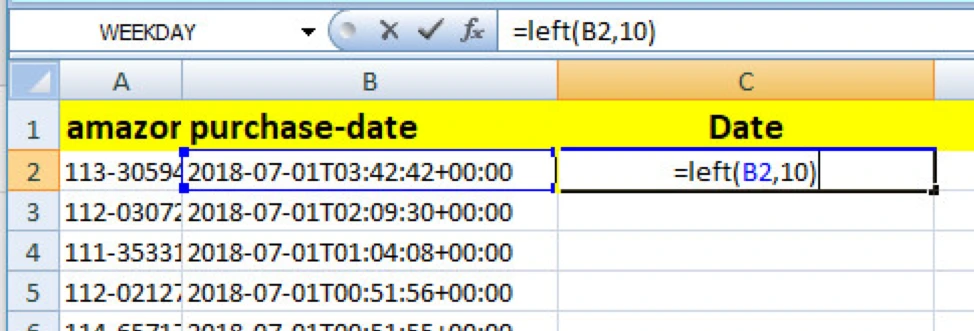
What this does is count the number of characters found in B2 from the left over to the right by 10 and outputs only that data in the C cell we clicked in.
Remember, B2 is the original cell we are pulling the data from. If it were in a different cell, like D4, then you’d use D4 instead of B2.
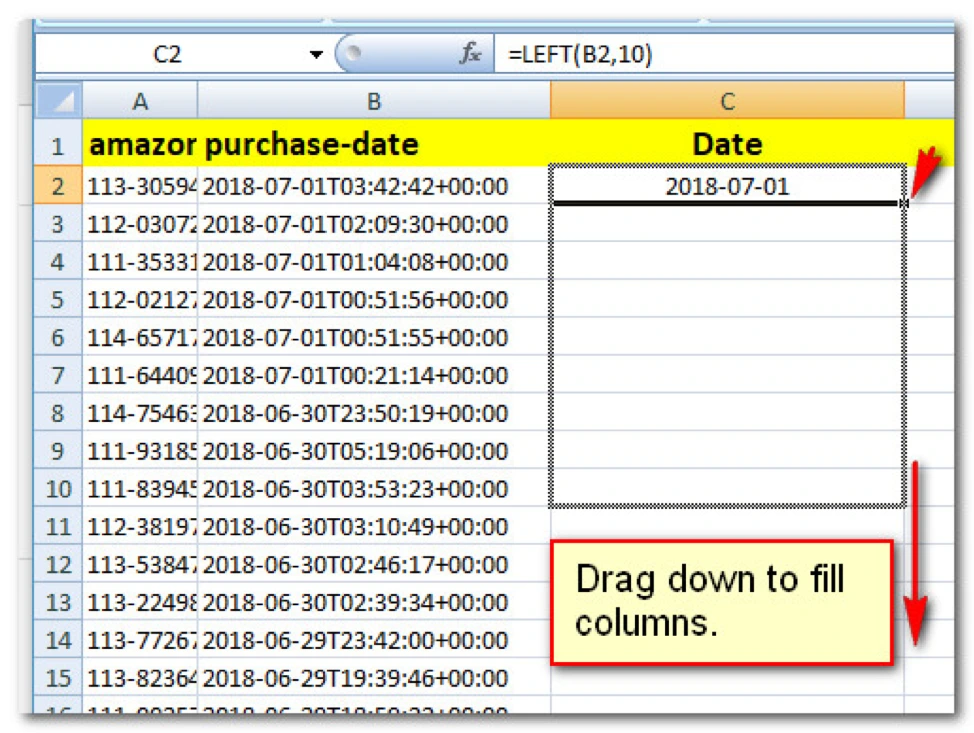
To fill in the rest of the C column, click and hold the little dot in the lower right corner of the new data you created in the C column and drag it all the way down to the last spot.
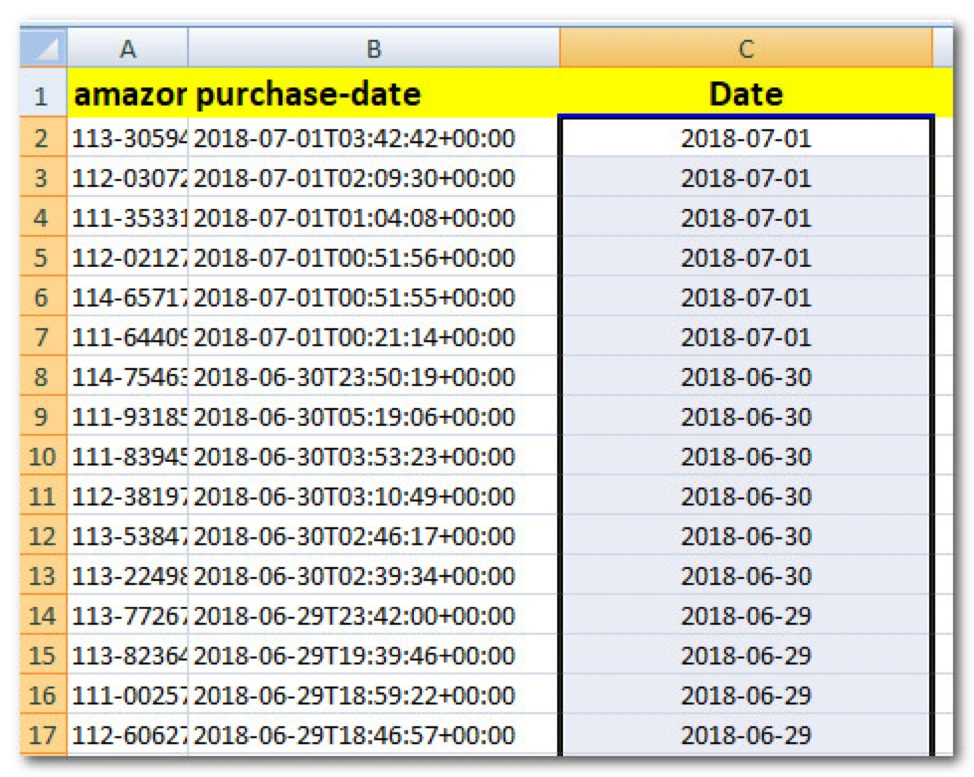
Now we will fill in the Day cells so we can see what the actual day of the week it was the sale happened on.
In this case, the Day fields are in the D column.
Click on the first cell and type this into it: =datevalue(C2)
C2 is what we are using in this example, so make sure it’s the correct field in your spreadsheet where your date is located.
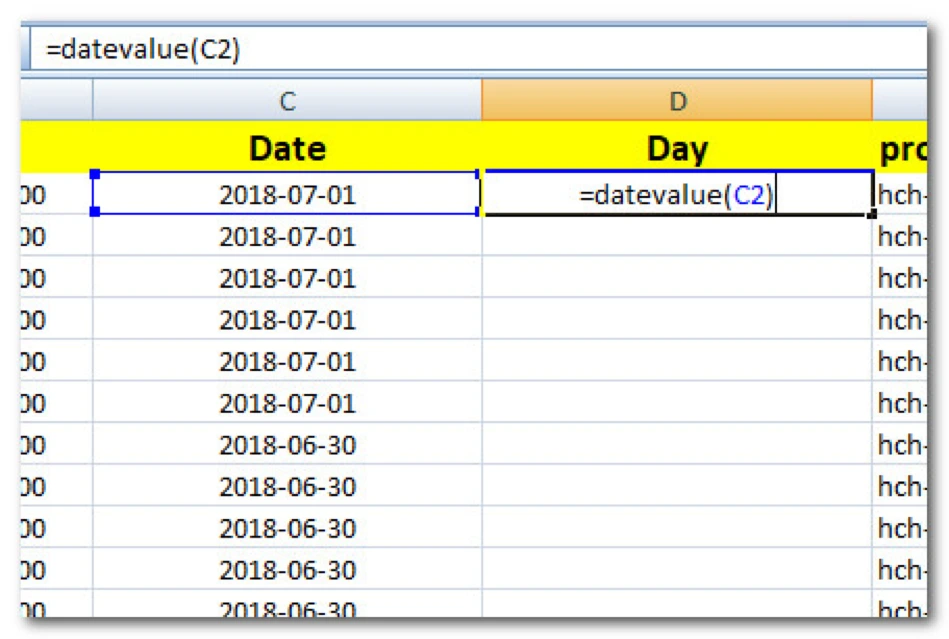
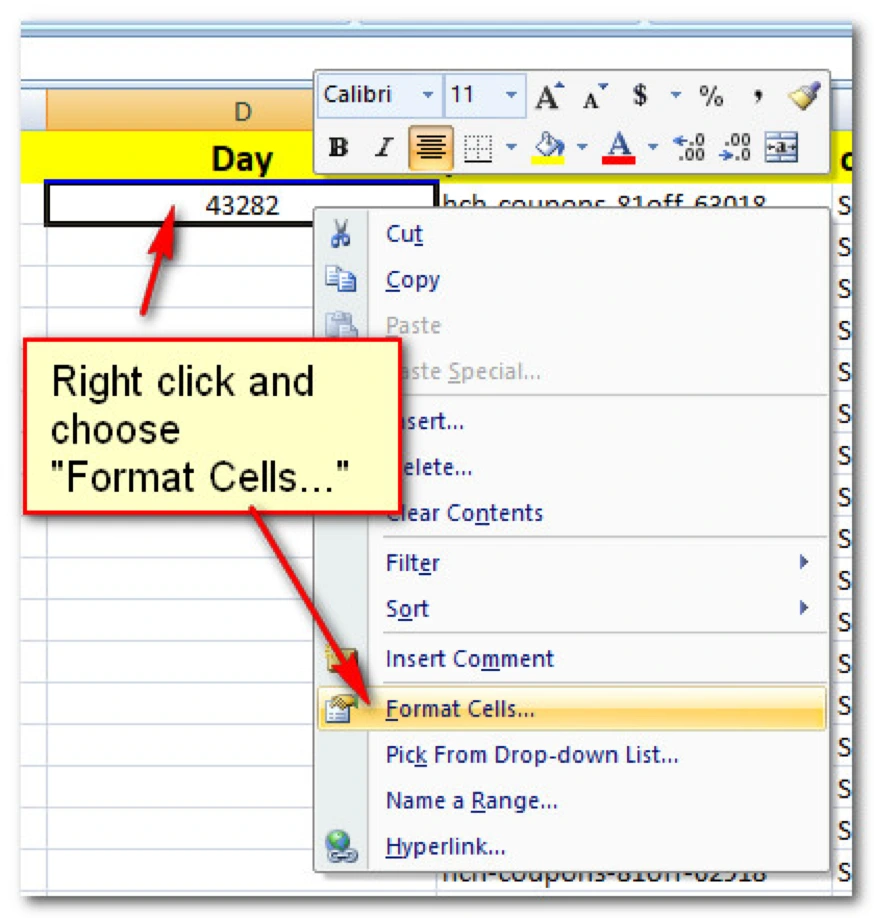
Once you hit enter, you’ll likely see a string of digits which are clearly not a day of the week. Here’s how you get those to show.
Right-click on the new cell’s data and choose Format Cells…
Choose Date under the Category options and then pick which format you’d like to display in the cell. In my case, I like to see the days of the week (Monday, Tuesday, Wednesday, etc.).
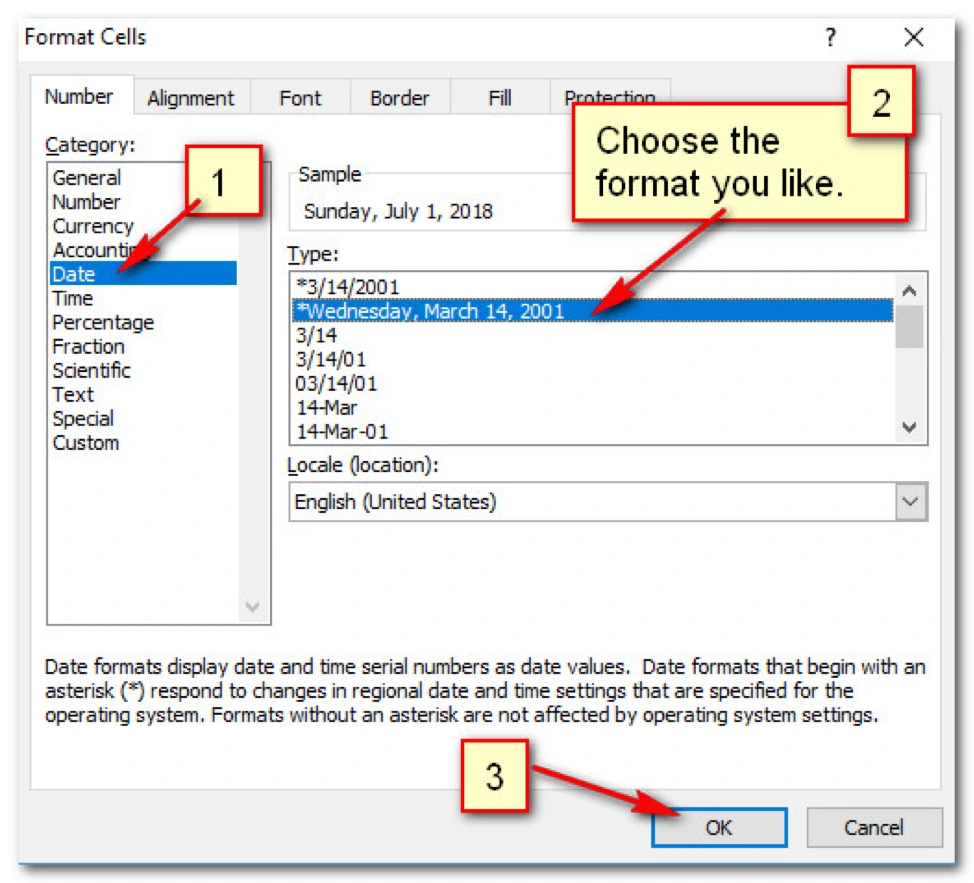
Now you should see whichever date format you chose to view in the cell.
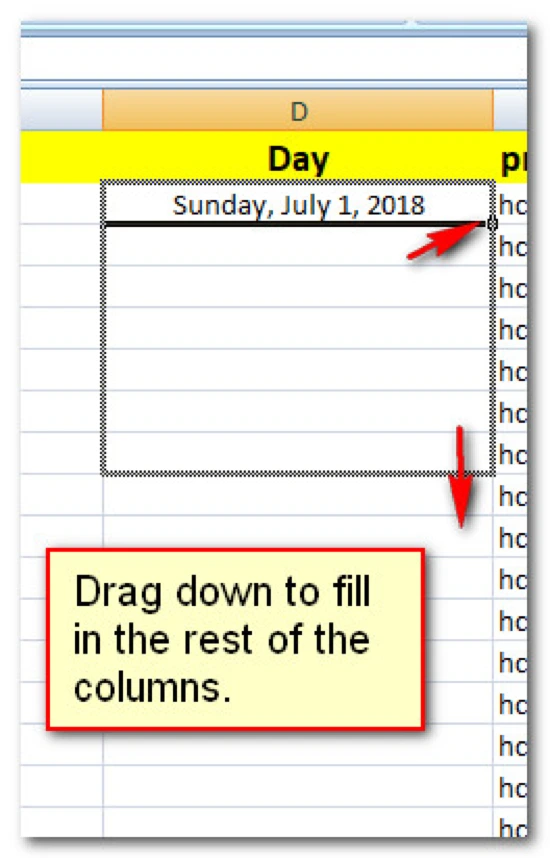
Just like before, to quickly populate the cells underneath it, click on the small dot in the lower right corner of the cell and drag it down to the bottom row.
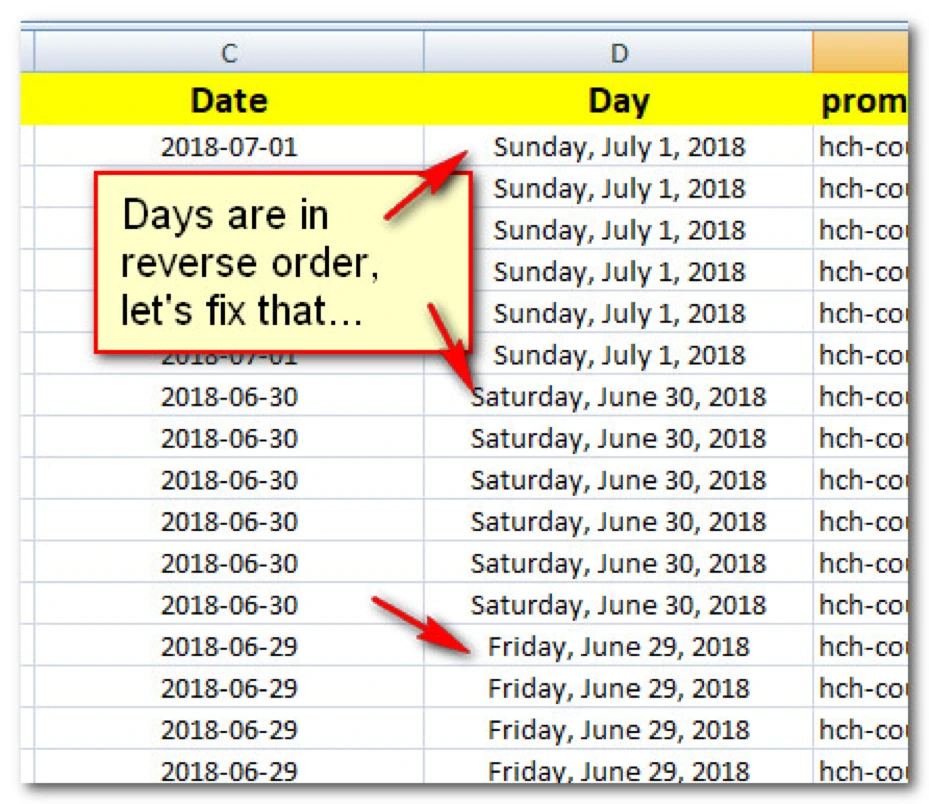
Now you should easily spot how many Amazon coupons were claimed each day of your promotion. The spreadsheet is pretty much done at this point, but we can clean it up just a little more.
The days are in reverse order from how you ran the promotion. We can use our spreadsheet’s Sort function to sort the list in the correct order.
Click the Sort button from within the Data tab.
Then in the box which pops up, choose the column you want to sort by, which in this case is Day, and sort the Values from Oldest to Newest.
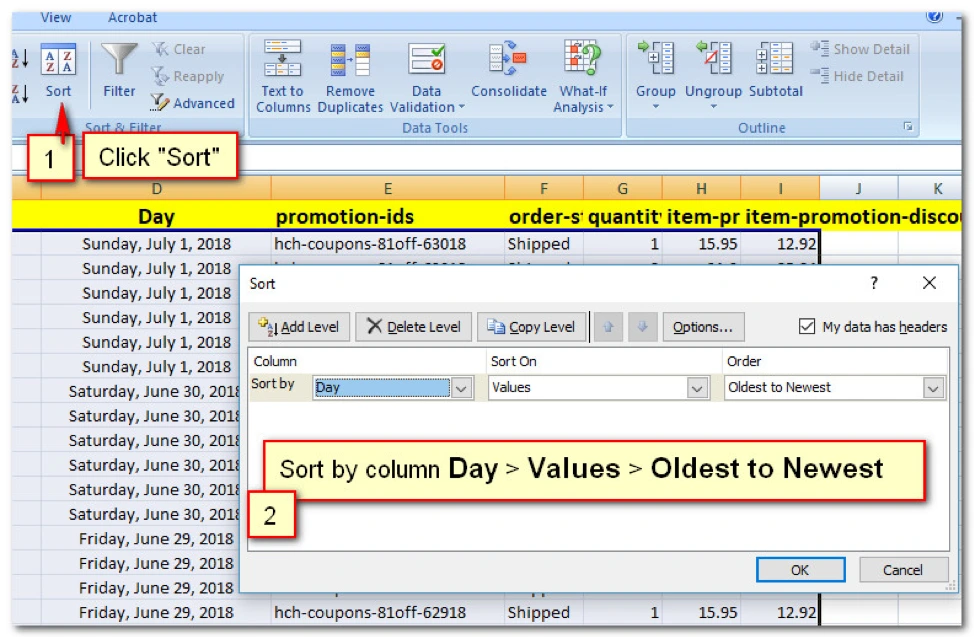
Now our spreadsheet gives us an excellent rundown of how many coupons were used each day of our promotion from day 1 to the final day.

I like to finish the report by adding a few columns for quick reference. Adding these columns is especially useful if you have an employee generate this report for you so you can quickly find the data you’re looking for.
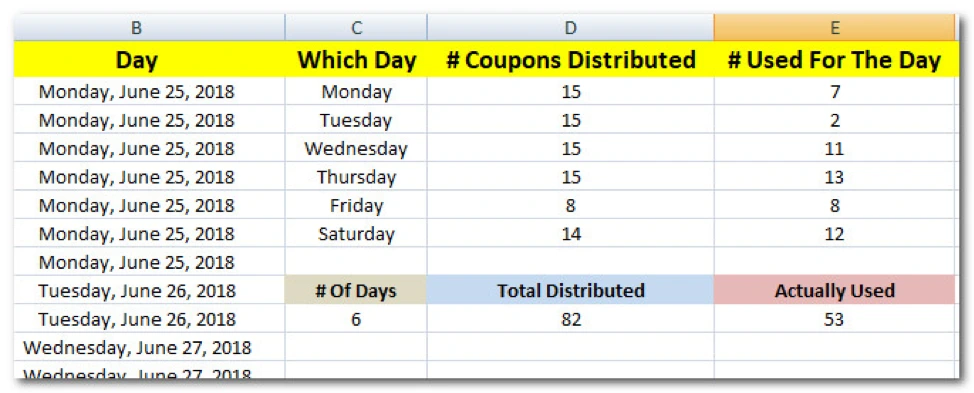
You might also want to put in another sheet/tab a profit or loss statement for the promotion, but I’ll leave that one up to you!
Okay my fellow Amazon sellers and business owners, I hope you found this Amazon coupon code tracking tutorial useful. If you did, please do me the honor of sharing this post so others can learn and leave a comment, so I know you stopped by.
Original post from How to Track an Amazon Coupon Code After a Product Launch – Helium 10


